PCB Fiber Laser Etch with ComMarker B4 and Lightburn
Initial revision April 6th 2023.
Property of Paul Ruby of PaulRubyAmplifiers.com
Copyright© 2023.
Contents
PCB
Prep for Single Sided Board
Creating
Vector Outline Layers
See Also:
Direct PCB Etching: https://paulrubyamplifiers.com/PCB_Tutorial.html
Black Image marking on Brass: https://paulrubyamplifiers.com/Black_Image_Engraving_on_Brass_ComMarkerB4.html
Frequency range: https://paulrubyamplifiers.com/FrequencyAndSpeed_ComMarkerB4.html
PCB Prep for Single Sided Board
Express PCB Plus
Free PCB creation software: ExpressPCB+ https://www.expresspcb.com/expresspcb-plus-pcb-layout-software/
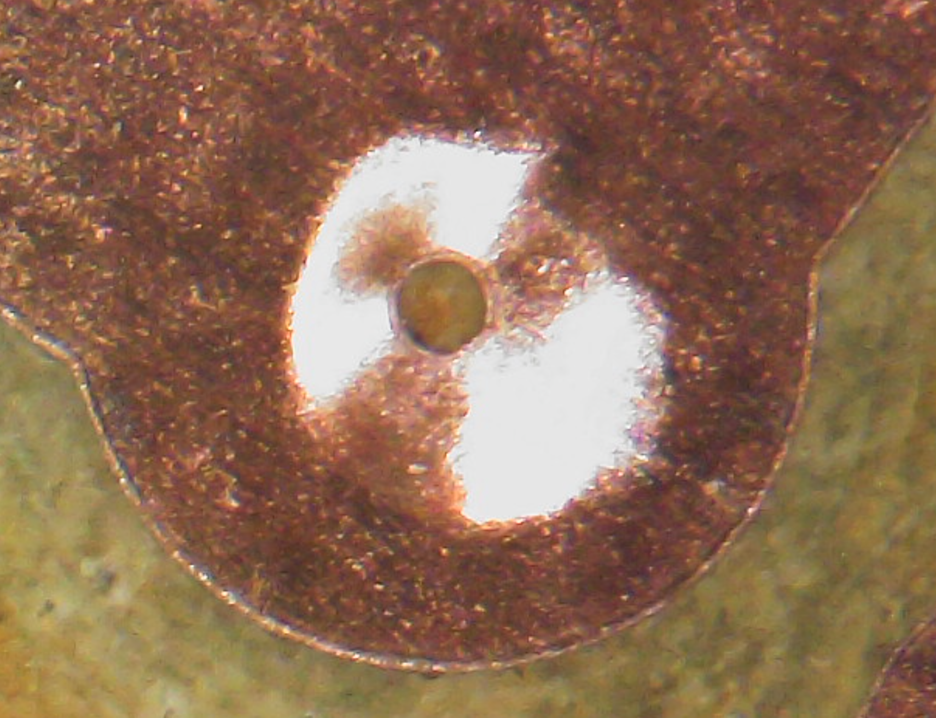
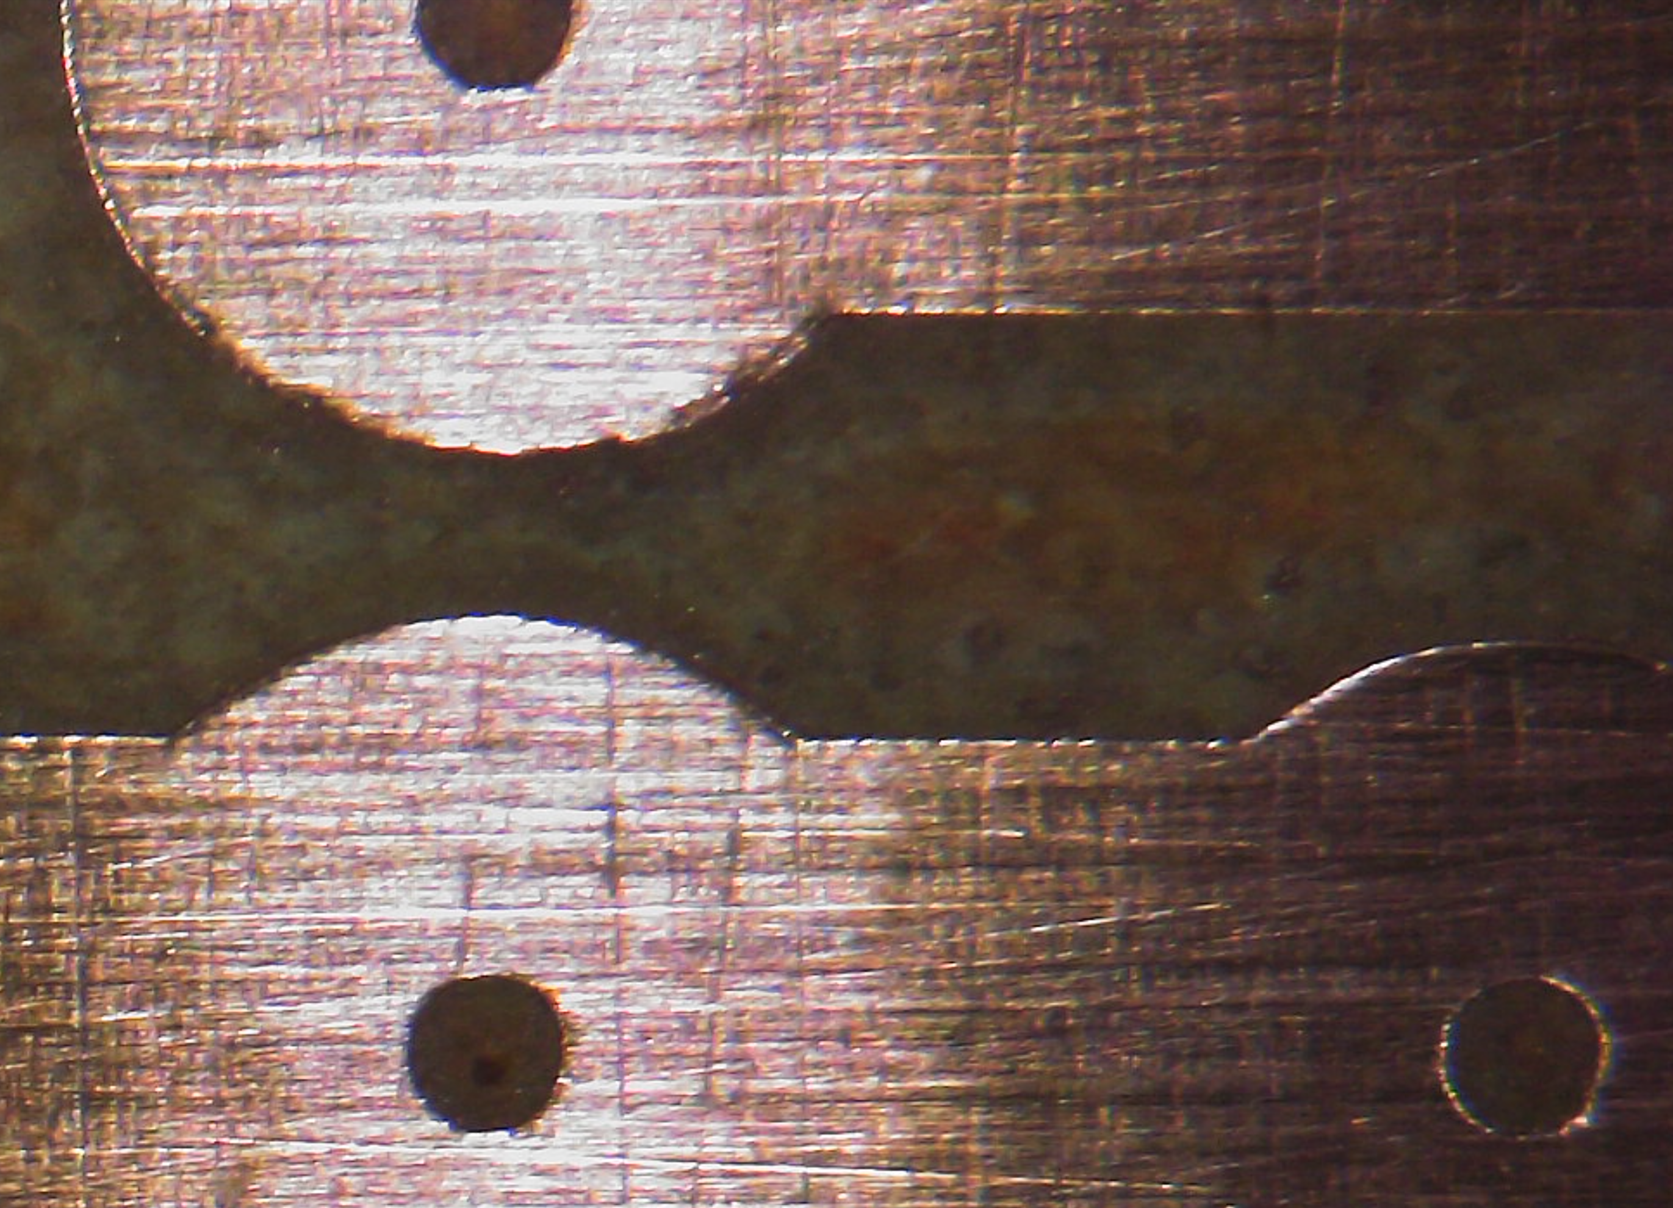
Hole Size
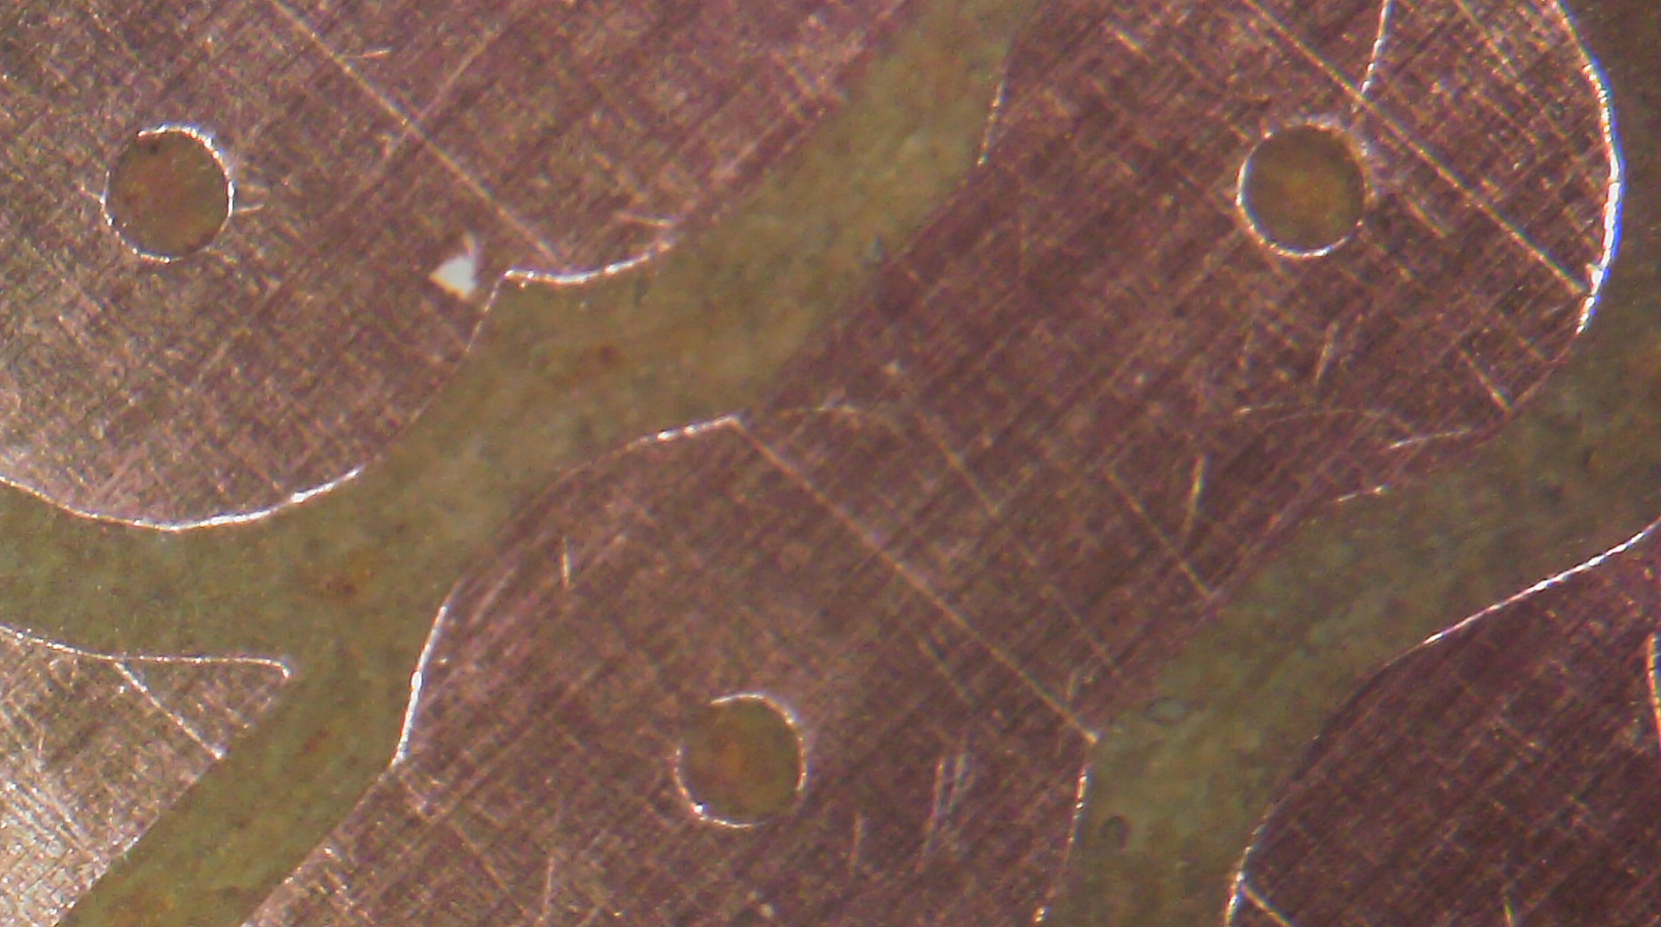
Assuming you will hand-drill, only a small dimple is needed on pads for bit alignment.
If made too small, however, there isn’t enough room for gas to escape and the pad can bubble.
This image shows an example of 0.01” hole, which is too small.
The shiny part is where the pad has lifted into a cone shape. With 0.02” holes, this does not happen.
I’m going to try 0.015” holes next and show how to do this here.
Express PCB Example
Here’s an example PCB created with ExpressPCB Plus.
I show this mainly for hole size setting.
Select everything in the PCB and then change the hole size to desired value.
This shows 0.015” which is what I’m going to etch next.
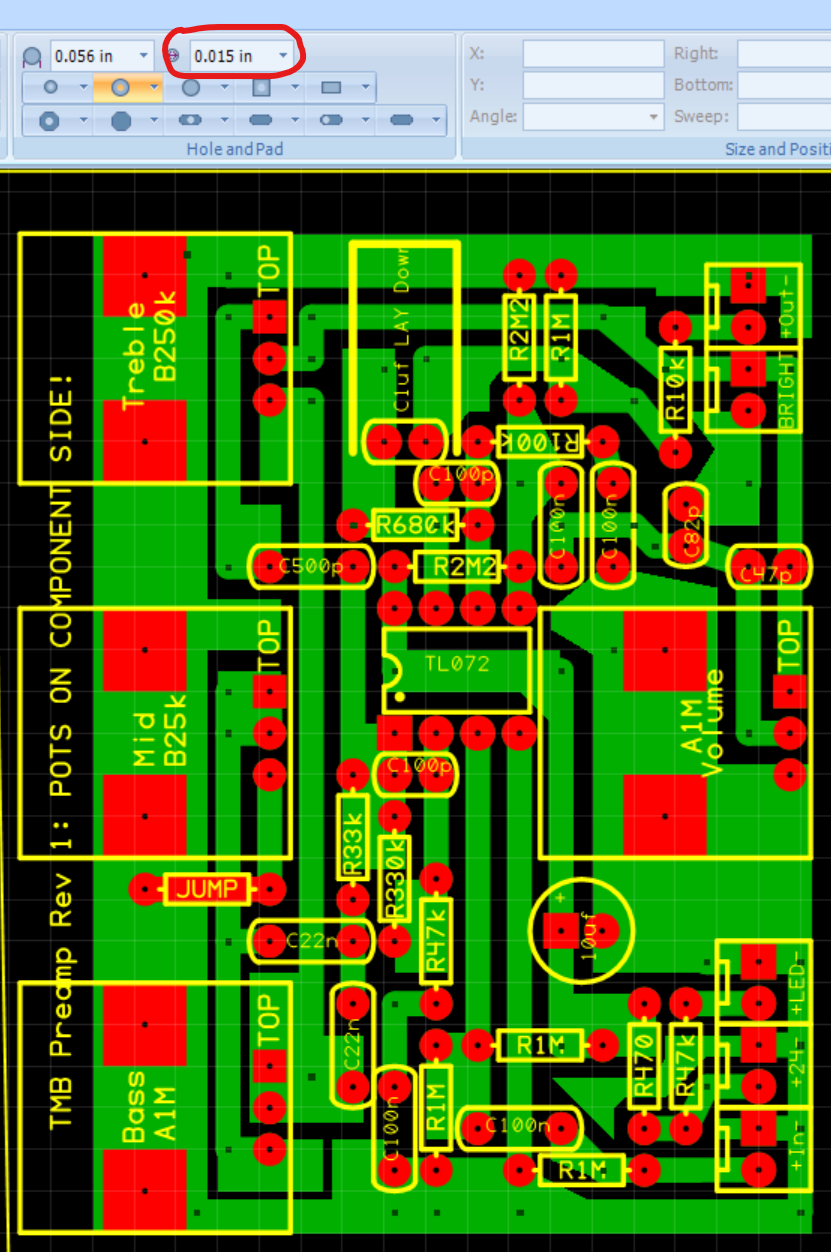
I’ve hand-filled as much of the space between lines using rectangles and polygons.
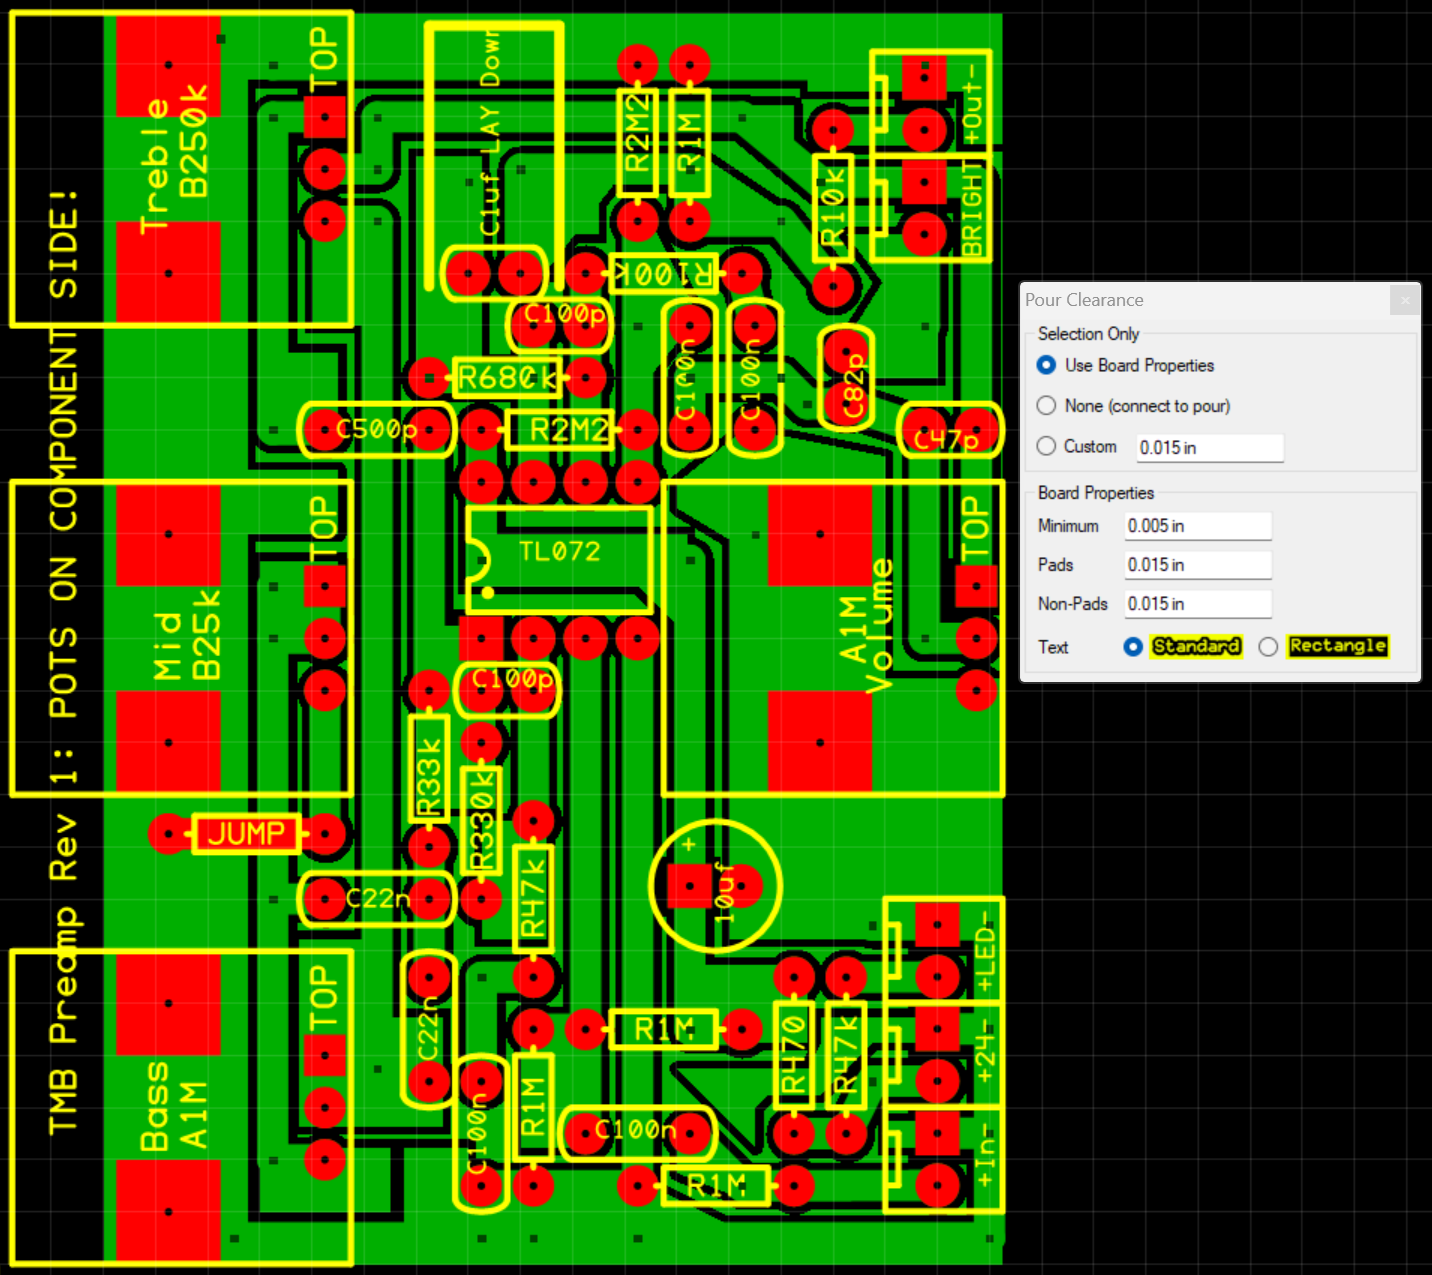
ExpressPCB can fill the spaces by drawing a rectangle on the bottom copper and setting it to “pour.”
Adjust the pour clearance as desired.
I’ve tried this but the result is copper that is not connected to any nodes.
It’s all free-standing copper islands.
I’ve not figured out how to make a pour that explicitly connects to the ground node.
Here’s what the above would look like with a pour fill added, which may result in a better etch.
With the PCB created and ready, print it to PDF for etching:
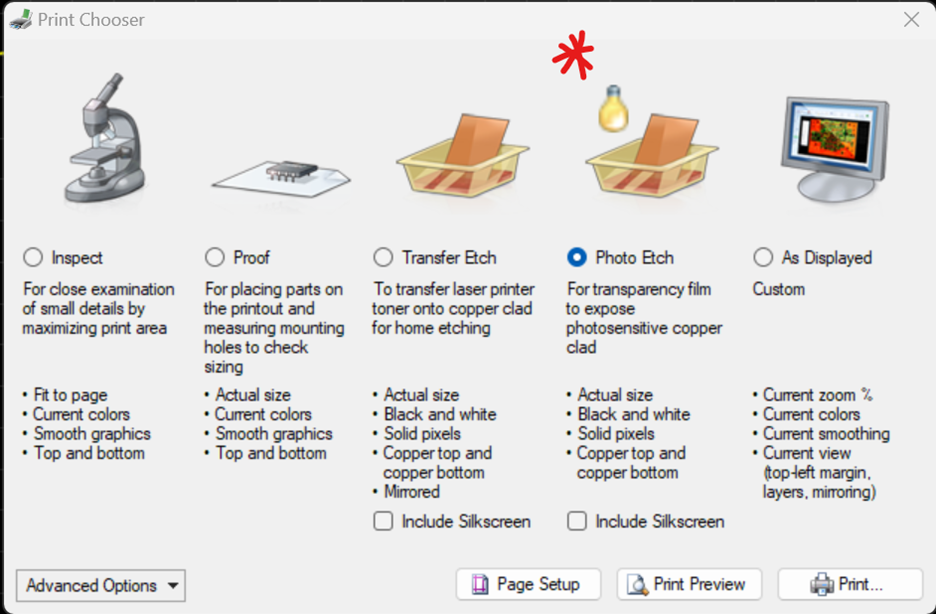
Once you have a PDF, the bottom copper page must be cropped while leaving a bit of blank outline.
I use GIMP to import the PDF and crop but you can use any tool you like.
When editing the PDF, use a very high resolution, at least 1000DPI, for very crisp edges.
This will be important once in Lightburn.
I also use GIMP to add some bit of text into the copper.
This is strongly suggested so that you can be sure the image is not mirrored once in Lightburn.
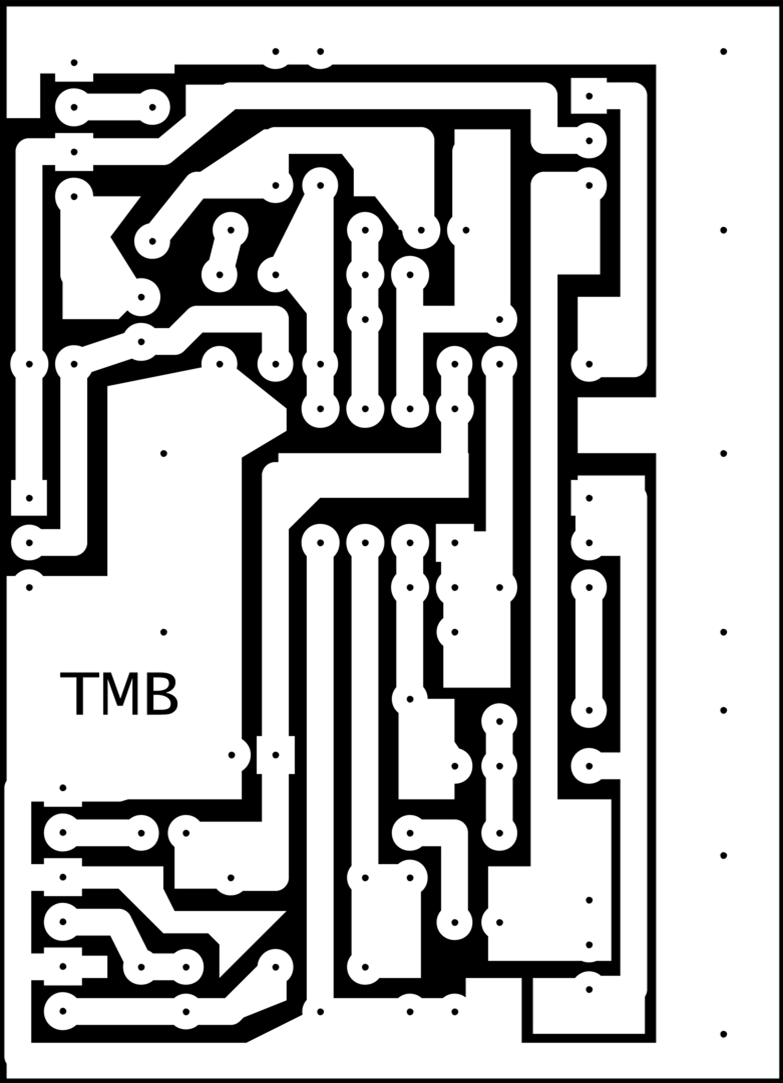
Here's the PNG image after GIMP processing.
Note the required bit of blank border and a bit of text for visual orientation for later in lightburn.
Also note this is mirrored horizontally when printing to PDF from ExpressPCB because it is the bottom copper.
Correct orientation is obviously very important.
Processing in Lightburn
Image Import
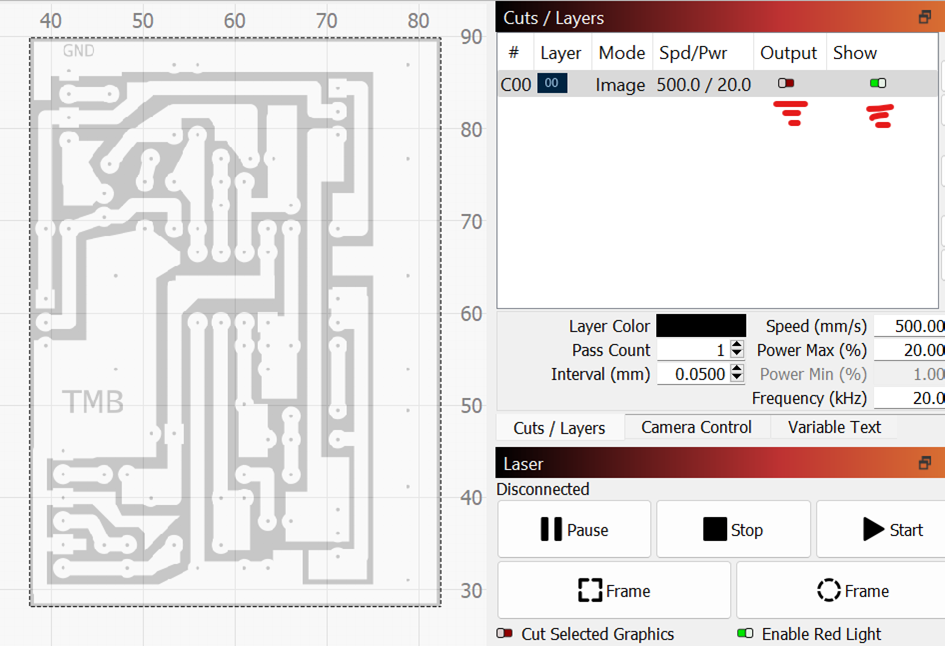
Create a new Lightburn file and drag in the image to layer 00.
This image layer will not be used directly for etching.
Set the layer properties to NOT output but leave it showing.
Creating Vector Outline Layers
The reason for using a very high resolution prior to importing is to ensure the tracing of the image is very accurate.
I used 2000DPI for my image.
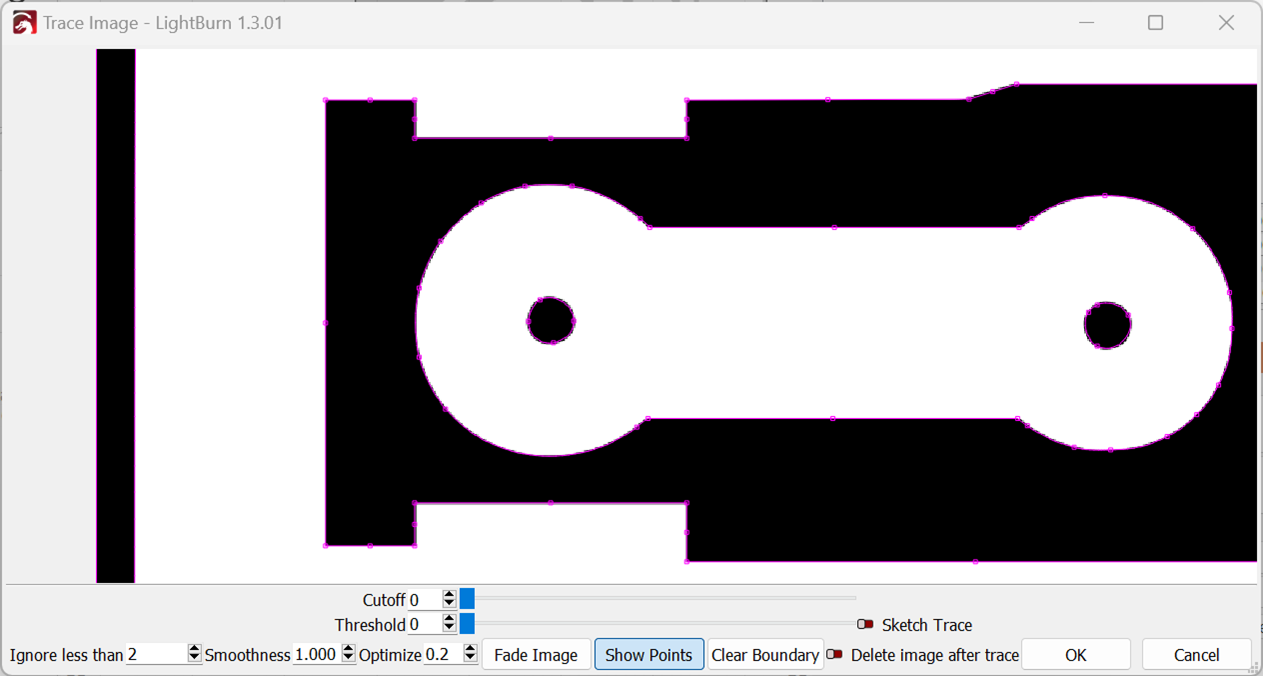
Select the image, right click and choose “Trace Image.”
This brings up a new window with options for tracing the image into a vector file.
Set Threshold to 0 to trace outside the entire copper area.
Click “Show Points” to see the created nodes of the trace.
Zoom in with the mouse wheel to look closely at the results.
At 2000DPI, the image is very crisp and easy to trace.
Feel free to adjust the settings to see how things change.
Click OK when you like the result.
Once you click OK, you will have vectors for layer 00.
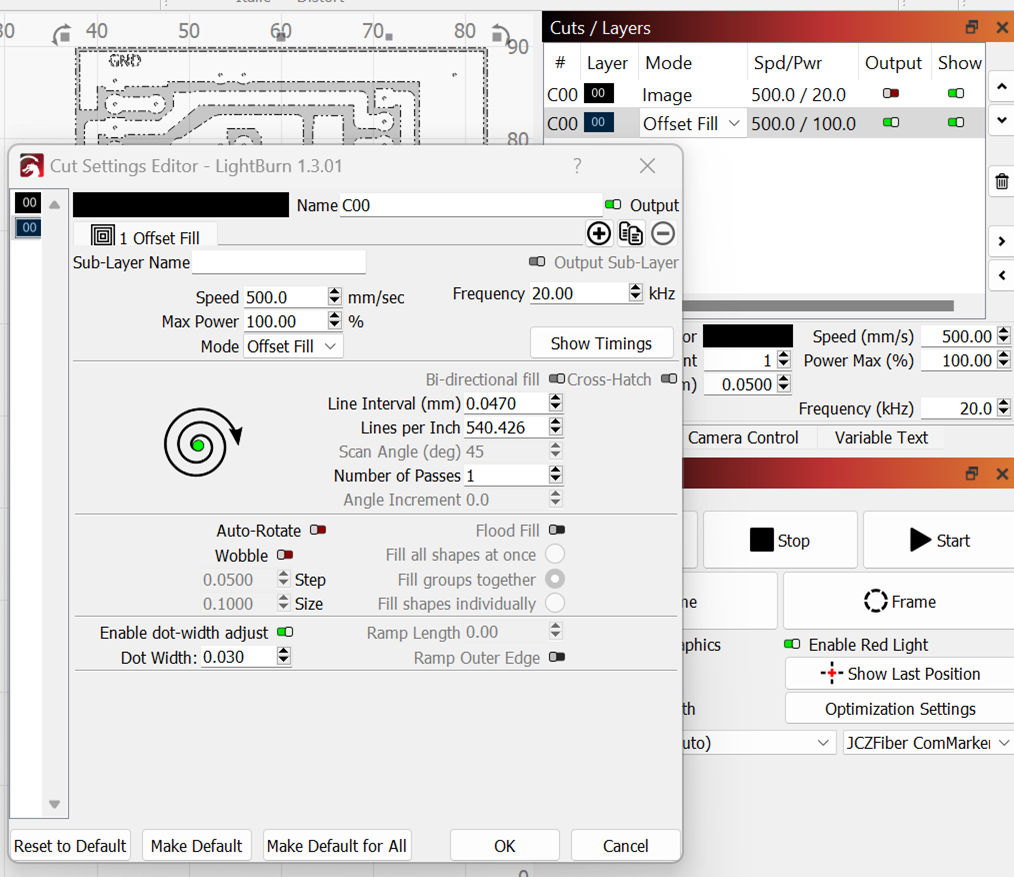
ComMarker B4 settings are shown here:
500mm/s; 100% power; 20khz pulses; Offset Fill; Dot-width adjustment of 0.03mm; line spacing of 47um.
The intent is to move fast and hot. Going slow causes damage.
Going fast and doing multiple passes yields better results and it’s easy to creep up on being finished.
I would go faster but have found the lines start to wiggle beyond 500mm/s.
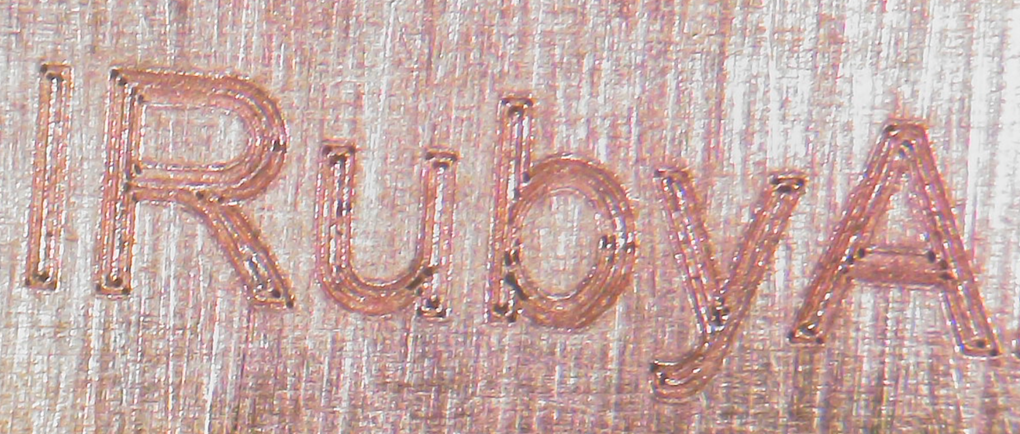
UPDATE: After running more boards, I suggest using a line
spacing of 30um to get tight overlap of lines.
39um spacing is still leaving a bit of copper between
lines.
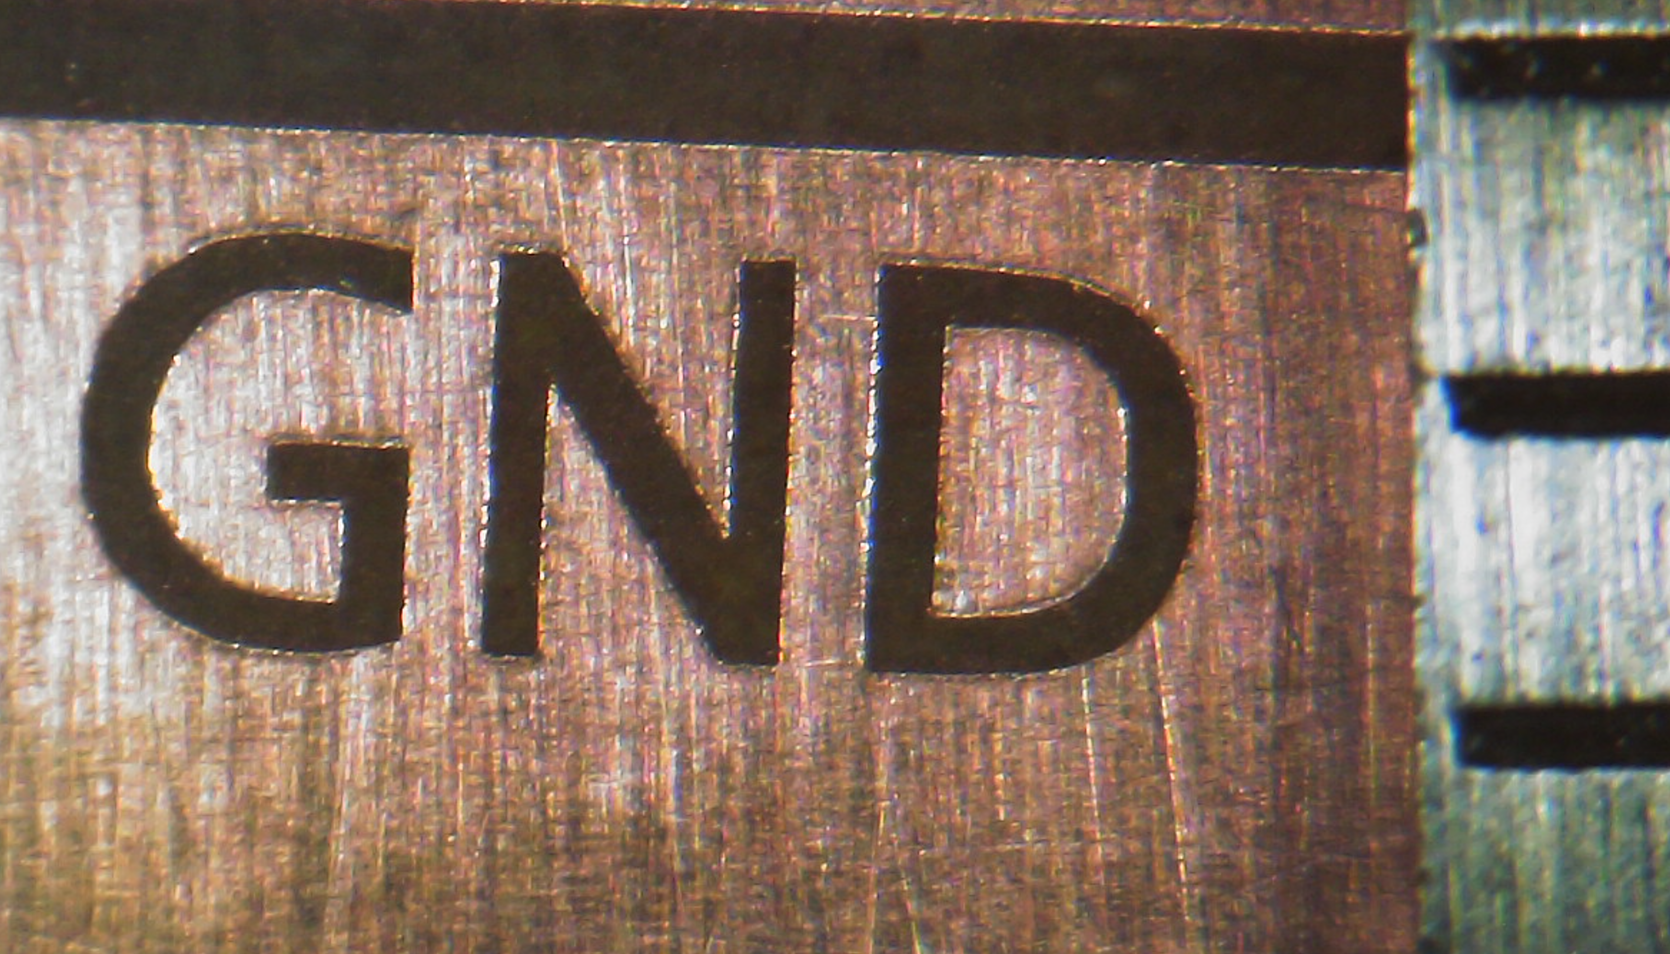
This image is an offset fill with 39um line spacing on
1.5mm text.
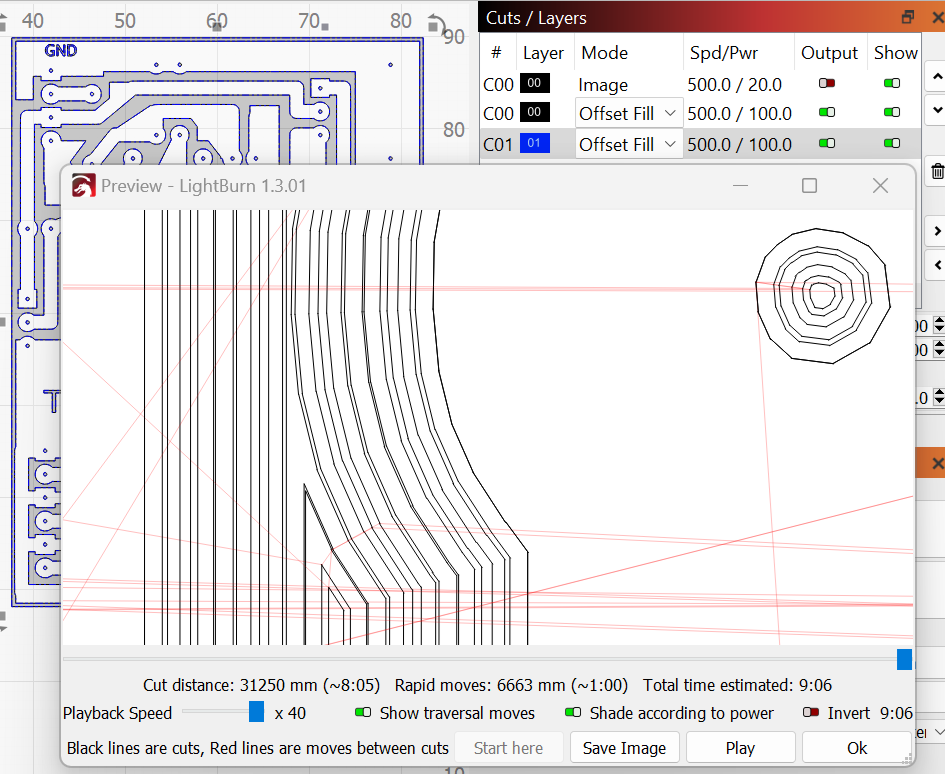
This layer will do the etching using a contour fill around and between all the copper to be left intact.
Here’s a close-up view of the preview to show how this layer will cut.

In order to ensure the copper is well cleared when etching, I also make a second trace layer.
With the tracing selected, hit ctrl-D to duplicate it.
Then click a new layer for it.
This layer will have the same settings with one exception: line spacing 1.3 times the other layer to create interleaving cuts.
In this case, 47um*1.3=61um.
UPDATE: I now use 30um for the first layer and 39um for this 2nd layer for tight overlap of etching.
Now the preview shows both layers and cut lines that don’t quite overlap, except for the first cut right at the copper edge.
Getting Perfect Focus
Perfect focus for etching is critical.
My B4 has a slight focus variation around the full size of the table.
It’s large enough to make it impossible to etch a very large PCB without a bit of shimming.
Small boards can be done bolted down.
I use the acrylic alignment bars as clamps to bolt the PCB down tight to the table.
This is very important. A half mm out of focus will not etch efficiently.
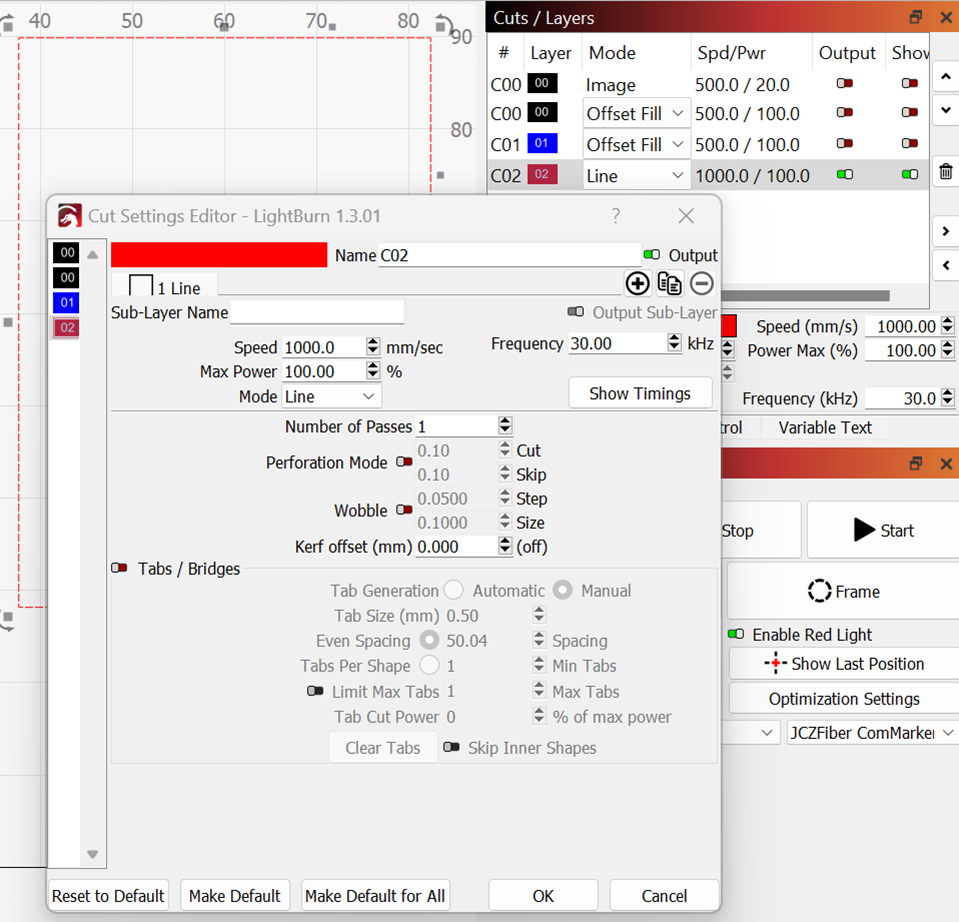
In order to test the focus, make one more layer to etch the outline of the board.
The tracings we made above already have a cut line around the outside.
Select the tracing and ungroup it with ctrl-u.
Then select only the outermost cut line and duplicate it using ctrl-d and put it on a new layer.
This will be used to test the focus.
At this point, only this layer is selected to be shown and output to the laser.
Run this once to make sure you have a very bright etch on the board around the entirety of the outline.
Only about 10 passes will fully cut through, so you don’t have many chances to do this test.
Don’t use a continuous run. Just once, then small tweak if needed, and repeat.
Time To Etch
Lightburn Settings
When ready to etch, only the two offset fill layers should be output.
Your PCB must be bolted down flat to the table and perfectly in focus.
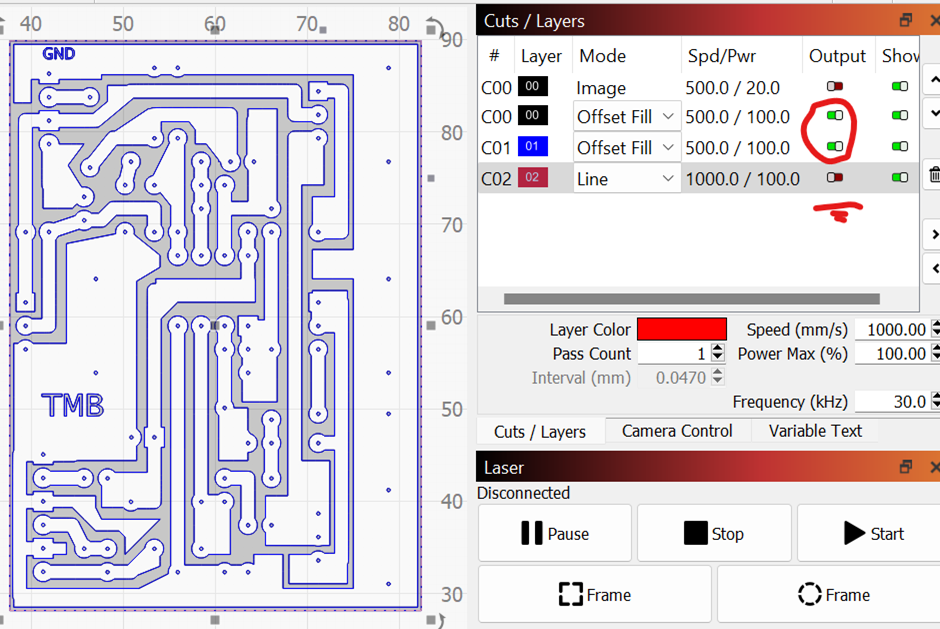
The two layers are each configured for 1 pass.
So, two cutting passes will be done, one by each layer, for each run of the full job.
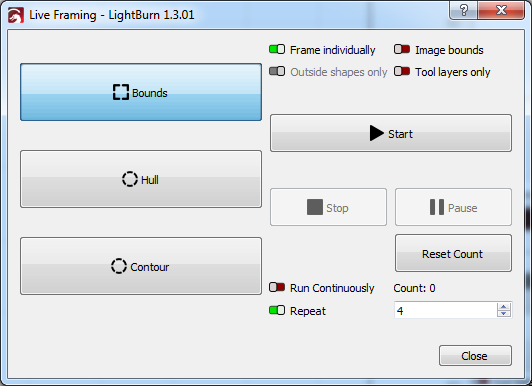
Click the Frame button to get to the job dialog box.
From here you can choose the number of repeat passes.
When in perfect focus, I’ve found about 8 total cuts, which is 4 repeats of the job, is enough.
If focus is not perfect or you have some variation in focus across the PCB, you may need a few more passes.
Perfect focus is critical.
Results
After 5 passes of the job and then buffed with steel wool.
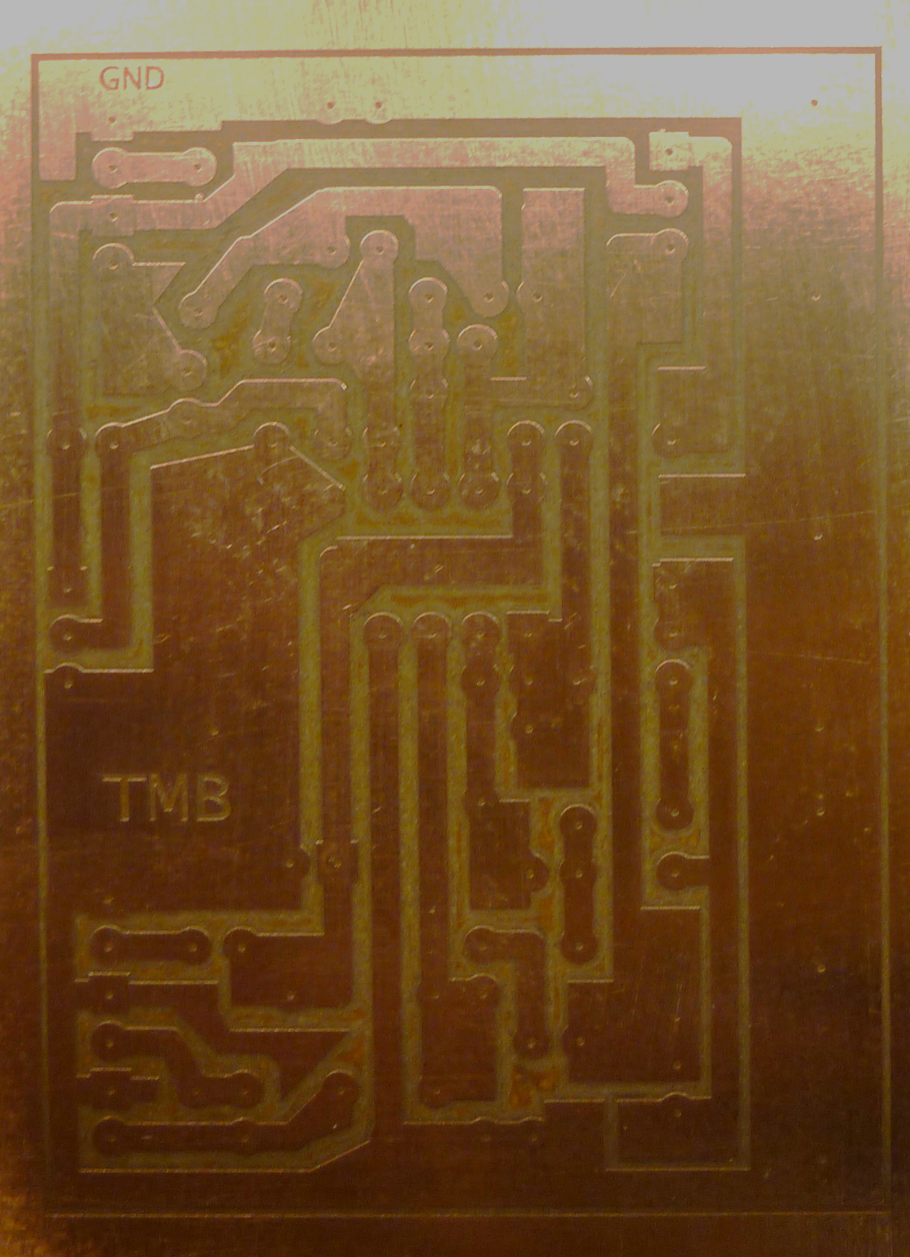
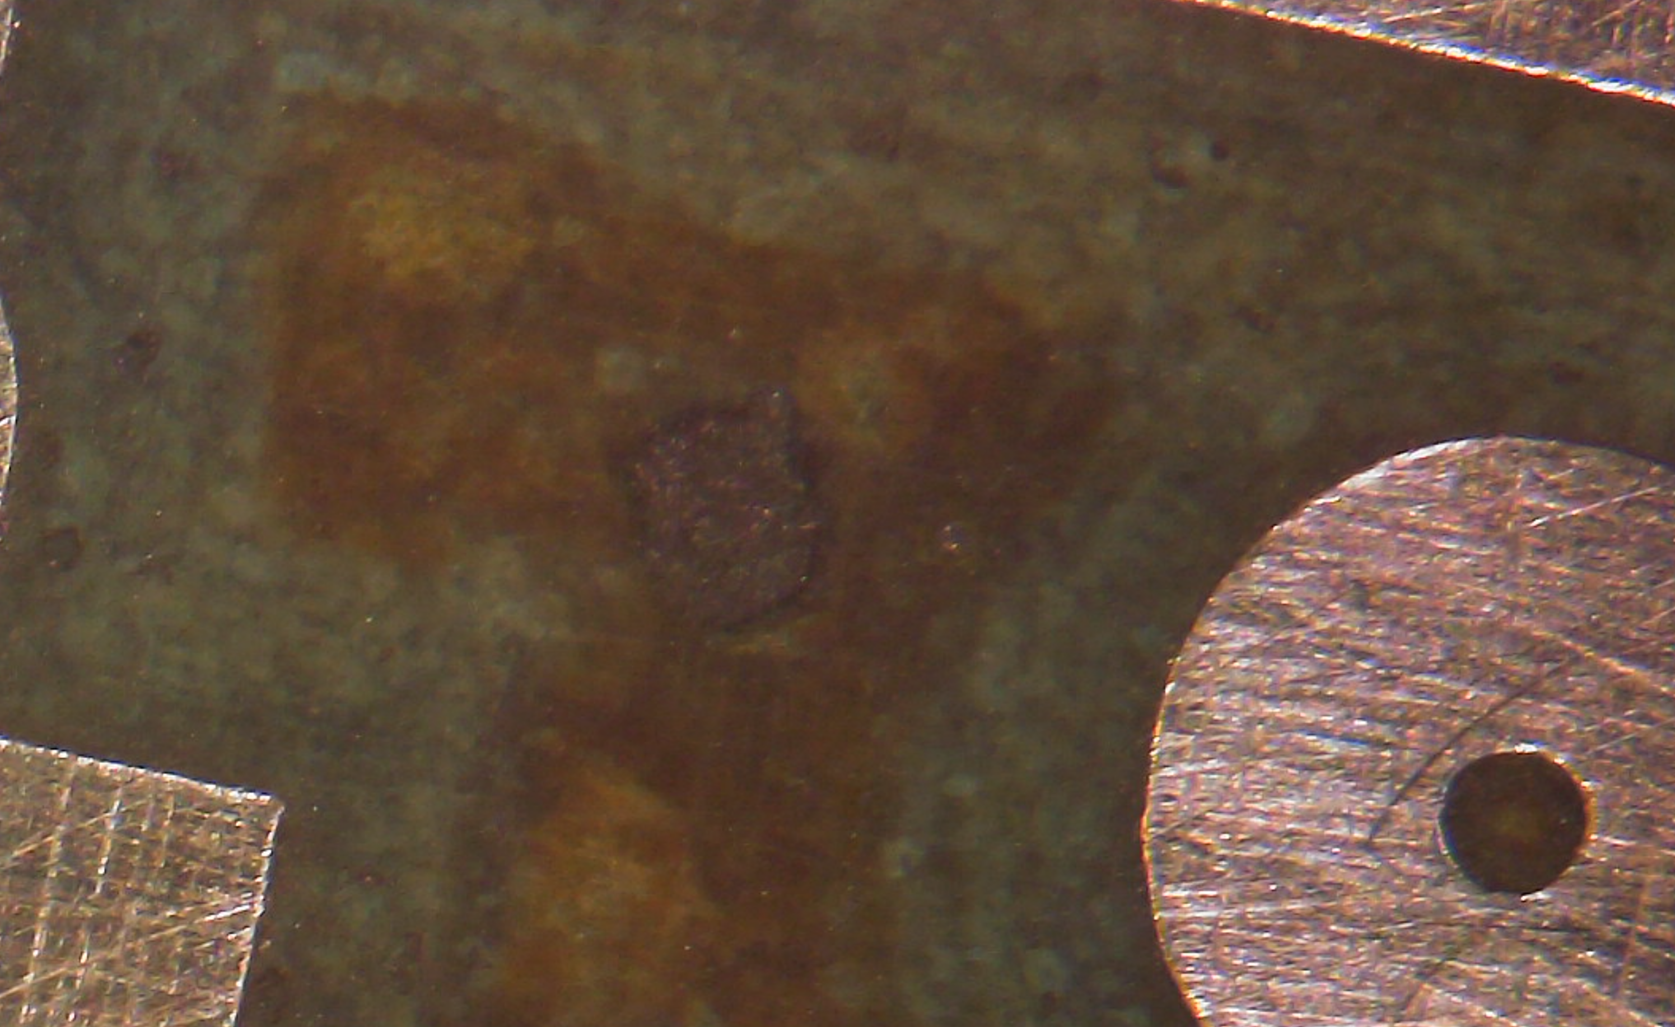
The results are very good but do show some signs of burning the phenolic board in some spots.
This is especially true for larger etched spots. Doing a pour-fill to eliminate such areas may result in a better etch.
Small text is very clear. The ruler in this picture is mm. This suggests doing a pour fill with tight clearance would work very well. Next time. 😊
UPDATE: Doing a Pour fill improves the results and
drastically reduces run time due to less etching. Well worth doing.
DISCLAIMER
Last updated April 06, 2023
The information provided by Paul Ruby Amplifiers ("we," "us," or "our") on paulrubyamplifiers.com (the "Site") and this document is for general informational purposes only. All information is provided in good faith, however we make no representation or warranty of any kind, express or implied, regarding the accuracy, adequacy, validity, reliability, availability, or completeness of any information on the Site. UNDER NO CIRCUMSTANCE SHALL WE HAVE ANY LIABILITY TO YOU FOR ANY LOSS OR DAMAGE OF ANY KIND INCURRED AS A RESULT OF THE USE OF THE SITE OR RELIANCE ON ANY INFORMATION PROVIDED ON THE SITE. YOUR USE OF THE SITE AND YOUR RELIANCE ON ANY INFORMATION ON THE SITE IS SOLELY AT YOUR OWN RISK.
The Site and this document may contain (or you may be sent through the Site) links to other websites or content belonging to or originating from third parties or links to websites and features in banners or other advertising. Such external links are not investigated, monitored, or checked for accuracy, adequacy, validity, reliability, availability, or completeness by us. WE DO NOT WARRANT, ENDORSE, GUARANTEE, OR ASSUME RESPONSIBILITY FOR THE ACCURACY OR RELIABILITY OF ANY INFORMATION OFFERED BY THIRD-PARTY WEBSITES LINKED THROUGH THE SITE OR ANY WEBSITE OR FEATURE LINKED IN ANY BANNER OR OTHER ADVERTISING. WE WILL NOT BE A PARTY TO OR IN ANY WAY BE RESPONSIBLE FOR MONITORING ANY TRANSACTION BETWEEN YOU AND THIRD-PARTY PROVIDERS OF PRODUCTS OR SERVICES.
The Site and this document may contain testimonials by users of our products and/or services. These testimonials reflect the real-life experiences and opinions of such users. However, the experiences are personal to those particular users, and may not necessarily be representative of all users of our products and/or services. We do not claim, and you should not assume, that all users will have the same experiences. YOUR INDIVIDUAL RESULTS MAY VARY.
The testimonials on the Site are submitted in various forms such as text, audio and/or video, and are reviewed by us before being posted. They appear on the Site verbatim as given by the users, except for the correction of grammar or typing errors. Some testimonials may have been shortened for the sake of brevity where the full testimonial contained extraneous information not relevant to the general public.
The views and opinions contained in the testimonials belong solely to the individual user and do not reflect our views and opinions. We are not affiliated with users who provide testimonials, and users are not paid or otherwise compensated for their testimonials.
Except where specifically noted, permission must be obtained for
reproduction of any portion of the material on this website and in this
document. The material may not be edited or altered and must remain unchanged,
as published by Paul Ruby Amplifiers. To obtain permission to reproduce
material at this website (including text, images, and multi-media files) for any
purpose, submit the specifics of your request in writing via contact through
PaulRubyAmplifiers.com.
Artwork or images on this website and in this document may be
protected under copyright law. The unauthorized use of such material could be a
violation of the rights of the copyright owner. The unique branding of the
website and various official seals and marks may not be used without permission
of Paul Ruby Amplifiers. To use any information on this website or this
document not owned or created by CDE, permission must be obtained directly from
the copyright owner.
Paul Ruby Amplifiers shall have the unlimited right to use for any
purpose, free of any charge, all information submitted via this website and
this document, except those submissions made under separate legal contract.
Paul Ruby Amplifiers shall be free to use, for any purpose, any ideas,
concepts, or techniques contained in information provided through this website
and this document.